


Hey there! I'm a supplier of Allen - Bradley PLCs, and I've been in this business for quite a while. Today, I'm gonna walk you through how to configure an Allen - Bradley PLC. It might seem a bit daunting at first, but with the right steps, you'll be up and running in no time.
Step 1: Gather Your Tools and Equipment
First things first, you need to have all the necessary tools and equipment on hand. You'll need a computer with the appropriate software installed. For Allen - Bradley PLCs, Rockwell Automation's RSLogix 5000 software is a go - to choice. It's a powerful tool that allows you to program, configure, and troubleshoot your PLC.
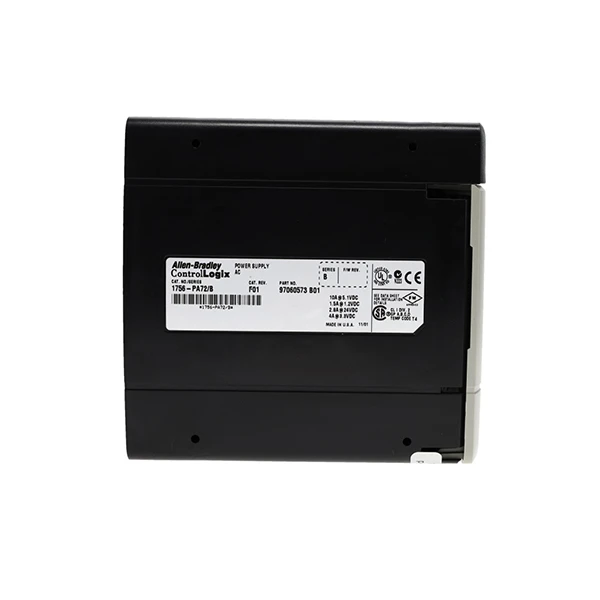
You'll also need the physical PLC unit. There are different models available, like the 1768 - L43S Allen - Bradley Compact, 1756 - PA72 Allen Bradley PLC, and 1756 - L74 Allen Bradley Controller. Make sure you choose the one that suits your specific application requirements.
In addition to the software and the PLC, you'll need a communication cable to connect your computer to the PLC. Ethernet cables are commonly used for this purpose, but depending on the PLC model, you might need a different type of cable.
Step 2: Install the Software
Once you have your computer ready, it's time to install the RSLogix 5000 software. Just follow the installation wizard on the software CD or download it from the official Rockwell Automation website. The installation process is pretty straightforward, and it'll guide you through all the necessary steps.
After the installation is complete, you might need to activate the software using a license key. Make sure you have the correct license key handy, as you won't be able to use the full features of the software without it.
Step 3: Connect the PLC to Your Computer
Now that the software is installed, it's time to connect the PLC to your computer. Plug one end of the communication cable into the Ethernet port on your computer and the other end into the corresponding port on the PLC.
Before you start configuring the PLC, you need to make sure that the communication settings between your computer and the PLC are correct. Open the RSLogix 5000 software and go to the communication settings section. Here, you'll need to set the IP address of the PLC and your computer to be on the same subnet. This allows them to communicate with each other properly.
Step 4: Create a New Project
Once the communication is established, open a new project in the RSLogix 5000 software. Give your project a meaningful name so that you can easily identify it later. You can also add a description to the project to provide more details about its purpose.
In the project creation window, you'll need to select the type of PLC you're using. Make sure you choose the correct model, as different models have different features and programming capabilities. For example, if you're using the 1756 - L74 Allen Bradley Controller, you'll need to select the appropriate option in the software.
Step 5: Configure the Hardware
After creating the project, it's time to configure the hardware. In the RSLogix 5000 software, there's a hardware configuration section where you can add and configure the different modules and components of your PLC system.
Start by adding the main PLC controller to the configuration. You'll need to specify the model number and other relevant details. Then, you can add input and output modules as needed. These modules are used to interface with external devices such as sensors and actuators.
For each module, you'll need to configure its parameters, such as the input/output addresses and the communication settings. This step is crucial, as it determines how the PLC will interact with the external devices.
Step 6: Program the PLC
Now comes the fun part - programming the PLC. In the RSLogix 5000 software, you can use different programming languages, such as ladder logic, function block diagram, and structured text. Ladder logic is the most commonly used language for PLC programming, especially for beginners.
To start programming, open a new routine in the software. A routine is a block of code that performs a specific task. You can create multiple routines to organize your program better.
In the routine, you can start adding ladder logic instructions. These instructions are used to control the flow of the program and perform different operations. For example, you can use contact instructions to read the status of input devices and coil instructions to control the output devices.
As you program, make sure you test your code regularly. You can use the simulation feature in the RSLogix 5000 software to test your program without connecting it to the actual hardware. This allows you to find and fix any errors in your code before deploying it to the PLC.
Step 7: Download the Program to the PLC
Once you're satisfied with your program, it's time to download it to the PLC. In the RSLogix 5000 software, there's a download option that allows you to transfer the program from your computer to the PLC.
Before downloading, make sure the PLC is in the correct mode. It should be in program mode or stop mode to accept the new program. Once the download is complete, you can switch the PLC to run mode, and it'll start executing your program.
Step 8: Test and Troubleshoot
After downloading the program, it's important to test the PLC system to make sure it's working correctly. Connect the external devices to the input and output modules and start monitoring the system.

If you encounter any issues, don't worry. The RSLogix 5000 software has a built - in diagnostic tool that can help you identify and troubleshoot the problems. You can check the status of the input and output devices, monitor the values of different variables in the program, and use the error messages to find the root cause of the problem.
Conclusion
Configuring an Allen - Bradley PLC might seem like a complex task, but if you follow these steps, you'll be able to do it successfully. Remember to gather all the necessary tools and equipment, install the software correctly, connect the PLC to your computer, create a new project, configure the hardware, program the PLC, download the program, and test and troubleshoot the system.
If you have any questions or need further assistance with configuring or purchasing an Allen - Bradley PLC, feel free to reach out. I'm here to help you with all your PLC needs. Whether you're a small - scale user or a large - scale industrial operation, I can provide you with the right solutions and support. Contact me to start a discussion about your specific requirements and let's work together to find the best PLC solution for you.
References
- Rockwell Automation Documentation
- RSLogix 5000 User Manual


