


Hey there! As a supplier of Schneider Variable Frequency Drives (VFDs), I've seen firsthand how important it is to install these devices correctly. A proper installation not only ensures the smooth operation of your equipment but also extends the lifespan of the VFD. In this blog post, I'll walk you through the steps to install a Schneider VFD correctly.
Step 1: Preparation
Before you start the installation process, you need to gather all the necessary tools and materials. Here's a list of what you'll need:
- A suitable mounting surface: Make sure the surface is flat, sturdy, and can support the weight of the VFD.
- Screwdrivers: You'll need both flathead and Phillips head screwdrivers for various tasks.
- Wire strippers: These are essential for preparing the wires for connection.
- Electrical tape: Use it to insulate the wire connections and prevent short circuits.
- A multimeter: This tool will help you check the voltage and continuity of the electrical circuits.
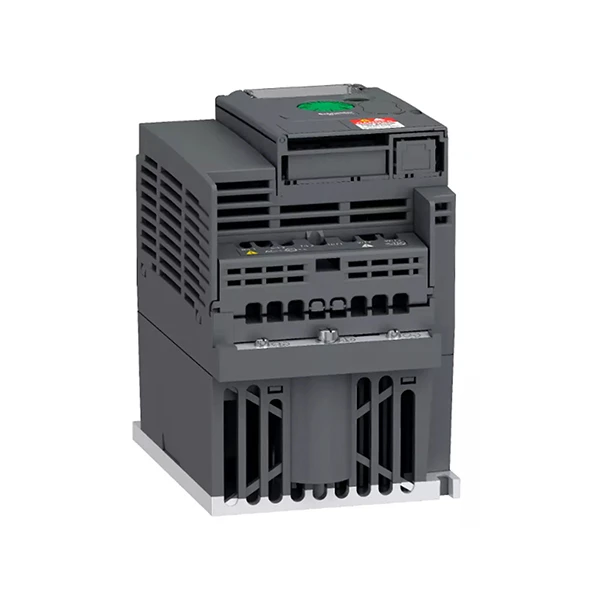
- The Schneider VFD: For example, you might have an ATV310HU22N4E Schneider Electric, Schneider ATV610D22N4, or Schneider ATV320U40N4B Variable Speed Drive. Make sure you have the right model for your application.
Step 2: Mounting the VFD
The first physical step is to mount the VFD on the chosen surface. Follow these steps:
- Locate the mounting holes on the back of the VFD. These holes are usually clearly marked.
- Align the VFD with the mounting surface and mark the positions of the holes on the surface.
- Drill holes in the marked positions on the mounting surface. Make sure the holes are the right size for the screws you'll be using.
- Insert the screws into the holes on the VFD and then into the holes on the mounting surface. Tighten the screws securely, but don't over - tighten them as this could damage the VFD.
Step 3: Electrical Connections
Now comes the crucial part - making the electrical connections. This step requires careful attention to detail to avoid any electrical hazards.
- Power Input: First, identify the power input terminals on the VFD. These are usually labeled as L1, L2, and L3 for three - phase power or L1 and L2 for single - phase power. Before making any connections, ensure that the power supply is turned off. Use your wire strippers to strip the insulation from the power supply wires, and then connect them to the corresponding terminals on the VFD. Secure the connections with terminal screws and cover them with electrical tape.
- Motor Output: Next, connect the motor to the VFD. Locate the motor output terminals on the VFD, which are typically labeled as U, V, and W. Strip the insulation from the motor wires and connect them to the appropriate terminals. Again, use terminal screws to secure the connections and insulate them with electrical tape.
- Control Wiring: The VFD also requires control wiring for functions like start/stop, speed control, etc. Identify the control terminals on the VFD. You may need to connect wires from a control panel or a remote control device. Make sure to follow the wiring diagram provided in the VFD's user manual. This will ensure that the control signals are transmitted correctly.
Step 4: Grounding
Proper grounding is essential for the safety and proper operation of the VFD. Locate the grounding terminal on the VFD, which is usually marked with the ground symbol (a horizontal line with three downward - pointing lines). Connect a grounding wire from the VFD's grounding terminal to a reliable ground source, such as a grounding rod or a building's grounding system. Make sure the connection is tight and secure.

Step 5: Configuration
After the physical installation and electrical connections are complete, it's time to configure the VFD.
- Power on the VFD: Once you've double - checked all the connections, turn on the power supply. The VFD should display its startup screen.
- Navigate the Menu: Use the keypad or control panel on the VFD to navigate through the menu. You'll need to set parameters such as the motor's rated power, voltage, current, and speed. Refer to the motor's nameplate for these values.
- Set Control Modes: You can choose different control modes depending on your application, such as V/F control or vector control. Select the appropriate mode according to your requirements.
- Test the Configuration: After setting all the necessary parameters, perform a test run. Start the motor at a low speed and gradually increase it. Observe the motor's operation and make sure there are no abnormal noises or vibrations. If you encounter any issues, refer to the VFD's troubleshooting guide.
Step 6: Safety Checks
Before leaving the installation site, perform a final safety check.
- Check for Loose Connections: Go over all the electrical connections again to make sure they are tight. Loose connections can cause overheating and electrical failures.
- Inspect the Wiring: Look for any signs of damaged wiring or exposed conductors. If you find any, repair or replace the wiring immediately.
- Verify the Grounding: Check the grounding connection to ensure it is still secure. A poor grounding connection can lead to electrical shock hazards.
Step 7: Documentation
Keep a record of the installation process. This includes details such as the date of installation, the model of the VFD, the settings you've configured, and any test results. This documentation will be useful for future maintenance and troubleshooting.
Tips and Tricks
- Always follow the manufacturer's instructions: The user manual that comes with the Schneider VFD is your best resource. It contains detailed information about installation, configuration, and safety precautions.
- Use the right tools: Using the correct tools will make the installation process easier and safer. Make sure your tools are in good condition.
- Get help if needed: If you're not confident about any part of the installation process, don't hesitate to seek help from a professional electrician or contact our technical support team.
Conclusion
Installing a Schneider VFD correctly is a process that requires careful planning, attention to detail, and adherence to safety procedures. By following the steps outlined in this blog post, you can ensure a successful installation and enjoy the benefits of a reliable and efficient VFD system.

If you're interested in purchasing a Schneider VFD or need more information about installation and configuration, feel free to reach out to us. We're here to help you find the right solution for your application and ensure a smooth installation process.
References
- Schneider Electric VFD User Manuals
- Electrical Installation Standards and Guidelines


