

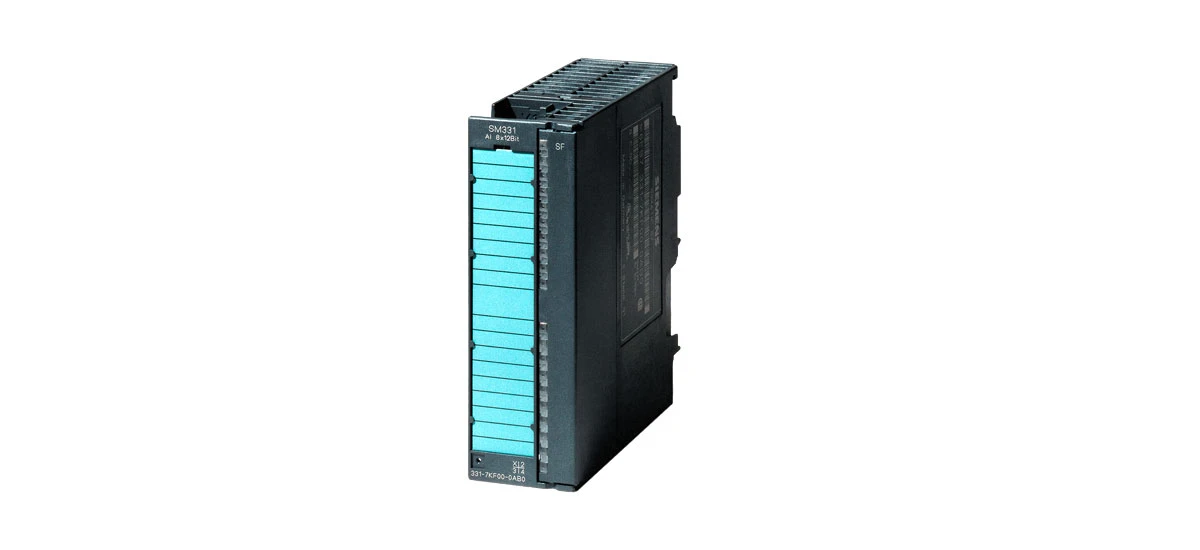
In the world of industrial automation, collecting accurate data from machines and processes is key to keeping everything running smoothly. Sensors that measure things like temperature, pressure, and flow need a reliable way to send their data to the brain of the system – the PLC. That's where SIMATIC SM 331 comes in. This analog input module is a bridge between sensors and popular PLC systems like S7 - 300 and S7 - 1500.
It's widely used in factories, production lines, and industrial plants because of its ability to handle various types of analog signals and its strong performance in harsh environments. In this guide, we'll walk through how to connect SIMATIC SM 331 to these PLCs, step by step, so you can set up a strong and efficient automation system.
What is SIMATIC SM 331?
SIMATIC SM 331 is a popular analog input module used in industrial automation. It is part of Siemens' SIMATIC S7 family, designed specifically to convert analog signals from sensors into digital data that PLCs can understand. It plays a key role in collecting data from various sensors, such as temperature sensors (like thermocouples and RTDs), pressure transducers, and flow meters.
This data is then sent to PLC systems, like S7 - 300 and S7 - 1500, so that the PLC can make decisions and control machines. The SIMATIC SM 331 comes in different models, some with 4 input channels and others with 8, allowing it to handle multiple sensors at once. It is known for its reliability and accuracy, even in places with high levels of electrical noise, making it a top choice in many factories.
Why Connect SIMATIC SM 331 to S7 - 300/1500?
Connecting SIMATIC SM 331 to S7 - 300 or S7 - 1500 PLC systems is important for a smooth automation process. The S7 - 300 and S7 - 1500 are powerful PLCs that can process the data collected by SIMATIC SM 331 quickly. This connection allows the PLC to monitor real - time conditions in the factory.
For example, in a food processing plant, if a temperature sensor connected to SIMATIC SM 331 detects that the oven temperature is too high, the S7 - 300 or S7 - 1500 can send a signal to lower the heat, ensuring the food is cooked properly. In a chemical plant, pressure data from SIMATIC SM 331 can help the PLC prevent dangerous pressure buildups by shutting down a pump when needed. It also helps in keeping track of production data for better management, like recording how much material was used in a day or how many products were made, which aids in planning and improving efficiency.
Step - by - Step to Connect SIMATIC SM 331
SIMATIC SM 331 Installation Steps
First, you need to install the SIMATIC SM 331 correctly. Before starting, turn off the power of the PLC system to avoid electric shock – this is a crucial safety step. Then, take a look at the S7 - 300 or S7 - 1500 rack. The rack has slots numbered in order, and the SIMATIC SM 331 should be placed in a slot that's compatible with analog modules (check the PLC's user manual for slot assignments).
Hold the module firmly and align it with the guides on the rack. Push it gently until you hear a click, which means it has locked in place. To be sure, give it a light tug – it shouldn't come loose. This secure installation prevents loose connections that could cause data errors.
How to Connect SIMATIC SM 331 to S7 - 300
For the S7 - 300, you'll need a backplane bus connector, which is usually included with the module. This connector links the SIMATIC SM 331 to the S7 - 300's backplane bus, allowing data to flow between the module and the CPU. First, remove the protective cover from the back of the SIMATIC SM 331. Then, take the backplane bus connector and align its pins with the holes on the module's back. Push it in until it fits snugly.
Next, connect the other end of the connector to the corresponding port on the S7 - 300 CPU or the adjacent module in the rack. Check the labels on both the module and the PLC – they should have marks like "Bus Connector" or "CPU Link" to guide you. After connecting, use a small screwdriver to tighten the screws on the connector ends. This keeps the connection stable, even if the machine vibrates.
Connecting to S7 - 1500
Connecting SIMATIC SM 331 to S7 - 1500 is similar but has a few differences. The S7 - 1500 uses a different type of backplane bus system, often called the "SIMATIC Bus." The connecting cable for S7 - 1500 is usually a pre - made bus cable with specific connectors on both ends.
First, locate the bus port on the SIMATIC SM 331 – it's typically a small, rectangular port with a cover. Remove the cover and plug one end of the S7 - 1500 bus cable into this port. Then, find the corresponding bus port on the S7 - 1500 CPU or the previous module in the rack. Plug the other end of the cable into this port. You'll feel a slight click when it's properly connected. Unlike the S7 - 300, some S7 - 1500 connections don't need screws, but it's still good to check that the cable is firmly in place. This ensures that data transmission between SIMATIC SM 331 and S7 - 1500 is fast and uninterrupted.
Software Configuration
After the hardware connection, you need to configure the software using TIA Portal, which is Siemens' official software for programming and configuring S7 PLCs. Open TIA Portal on your computer and create a new project. Select the type of PLC you're using (S7 - 300 or S7 - 1500) from the list. Then, go to the "Device Configuration" tab. Here, you'll see a virtual representation of the PLC rack.
Find the slot where you installed the SIMATIC SM 331 and right - click on it. Select "Add New Object" and then choose "SIMATIC SM 331" from the list of modules. Make sure to pick the correct model (like 6ES7 331 - 7KF02 - 0AB0 for a common 4 - channel model) to match your hardware. Once added, double - click on the SIMATIC SM 331 module to open its properties. Here, you can set parameters such as the type of sensor connected (e.g., "Thermocouple K" or "4 - 20mA Pressure Sensor") and the range of the input signal (like 0 - 10V or -5 to +5V). These settings tell the PLC how to convert the analog signal from the sensor into meaningful data. For example, if you're using a temperature sensor that outputs 4 - 20mA, you'd set the module to recognize this range and convert it to a temperature value (like 0 - 100°C). After setting all parameters, click "Save" and then "Download to Device" to send the configuration to the PLC. The PLC will then restart with the new settings, and the SIMATIC SM 331 will start sending data.
SIMATIC SM 331 Signal Wiring Guide
Wiring the signals correctly is crucial for SIMATIC SM 331 to work. Each sensor has two or three wires, and the way you connect them depends on the sensor type. Let's start with a two - wire sensor, like some pressure transducers. These have a positive (+) and negative (-) wire. Connect the positive wire of the sensor to the "IN" terminal on the SIMATIC SM 331 – each input channel has its own "IN" terminal, labeled like "I0+" for channel 0. The negative wire goes to the "M" terminal, which is the common ground for the module, labeled "M0" for channel 0.
For a three - wire sensor, such as an RTD temperature sensor, there's usually a positive (+), negative (-), and a third wire for compensation (often labeled "C" or "S"). Connect the positive wire to "IN+", the negative wire to "IN-", and the compensation wire to the "C" terminal on the SIMATIC SM 331. If the sensor has a shield wire (a thin, braided wire around the other wires), connect it to the ground terminal on the module, usually marked with a ground symbol (⦿). The shield wire helps reduce electromagnetic interference from nearby motors or power lines, which can mess up the analog signal. After wiring, gently tug each wire to make sure they're tight in the terminals. Loose wires can cause the signal to drop or become inaccurate, leading to wrong data being sent to the PLC.
S7 - 1500 and SIMATIC SM 331 Compatibility
Many people wonder if S7 - 1500 is compatible with SIMATIC SM 331. The answer is yes, but there are some details to check. The S7 - 1500 is designed to work with various SIMATIC modules, including most models of SM 331. However, older versions of SIMATIC SM 331 might need a firmware update to work with the latest S7 - 1500 PLCs.
You can check the firmware version of your SIMATIC SM 331 by looking at the label on the module – it's usually a number like "V2.0" or "V3.1". The S7 - 1500's compatibility list, available on Siemens' website, will tell you which firmware versions are supported. Another thing to note is the TIA Portal software version. To connect SIMATIC SM 331 to S7 - 1500, you should use TIA Portal V13 or later – older versions might not have the necessary drivers for the S7 - 1500 or the latest SIMATIC SM 331 models. If you're using an older TIA Portal version, you can update it from Siemens' website for free. It's also a good idea to check the product manuals for both the S7 - 1500 and SIMATIC SM 331, as they often have a compatibility table that lists specific model numbers that work together.
SIMATIC SM 331 Troubleshooting Tips
If you have problems with SIMATIC SM 331, here are some tips to fix them. First, check the power supply. The SIMATIC SM 331 usually needs a 24V DC power supply, which is often provided by the PLC rack. Use a multimeter to measure the voltage at the module's power terminal – it should be between 22V and 26V. If the voltage is too low or missing, check the power cable for breaks or loose connections. A bad power supply can cause the module to not turn on at all.
Then, look at the connections. Loose or wrong connections are common issues. Disconnect and reconnect the sensor wires and the bus connector to make sure they're tight. Check that the sensor wires are connected to the correct terminals – mixing up positive and negative can cause wrong data or no data at all. If the data is incorrect, check the sensor. Maybe the sensor is faulty or not calibrated. You can test the sensor by connecting it to another device, like a multimeter, to see if it gives the right reading. If the sensor is working, check the software configuration. Make sure the signal range and sensor type in TIA Portal match the actual sensor – for example, if you set it to a 0 - 10V sensor but have a 4 - 20mA sensor connected, the data will be wrong. You can also use the diagnostic function in TIA Portal. Go to the "Online & Diagnostics" tab, select the SIMATIC SM 331 module, and look for error codes. A code like "SF" (System Fault) might mean a hardware problem, while "BF" (Bus Fault) could indicate a communication issue with the PLC. The TIA Portal help section explains what each error code means, making it easier to find the solution.
Conclusion
Connecting SIMATIC SM 331 to S7 - 300/1500 PLC systems is not too hard if you follow the steps. The SIMATIC SM 331 is a great module that helps collect important data for industrial automation, from temperature and pressure to flow and level.
By ensuring proper installation, with the module securely locked in the rack, correct wiring of sensors and bus connectors, and accurate software configuration in TIA Portal, you can make the most of this module and the PLC systems. Remember to check for compatibility between the SIMATIC SM 331 model, S7 PLC, and TIA Portal version, and use the troubleshooting tips if you run into problems. With this guide, you should be able to set up a reliable connection that keeps your industrial processes running smoothly and efficiently.


