


As a supplier of Allen - Bradley VFDs (Variable Frequency Drives), I've had the privilege of working closely with these remarkable devices. In this blog post, I'll guide you through the process of programming an Allen - Bradley VFD, sharing insights and practical steps based on my hands - on experience.
Understanding the Basics of Allen - Bradley VFDs
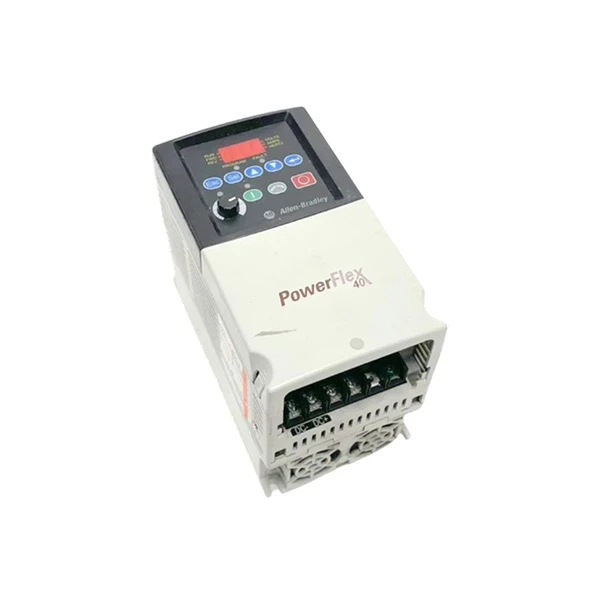
Before diving into programming, it's essential to understand what an Allen - Bradley VFD is and how it functions. A VFD is an electronic device that controls the speed and torque of an AC motor by varying the frequency and voltage supplied to the motor. Allen - Bradley, a well - known brand in the industrial automation field, offers a wide range of VFDs with different features and capabilities to meet various industrial needs. For example, the Allen - Bradley 22F - D4P2N103 VFD is designed for specific power requirements and applications, providing reliable motor control.
Pre - programming Preparations
Safety First
Safety is of utmost importance when working with VFDs. Before starting any programming, ensure that the power supply to the VFD is turned off. This prevents the risk of electric shock and damage to the device. Also, wear appropriate personal protective equipment (PPE) such as safety glasses and insulated gloves.
Gather the Necessary Tools
You'll need a programming device, which could be a handheld programmer or a computer with the appropriate programming software installed. For Allen - Bradley VFDs, the PowerFlex 750 - Series drives can be programmed using the Connected Components Workbench software. Make sure you have the correct cables to connect your programming device to the VFD.
Familiarize Yourself with the VFD
Read the user manual thoroughly. The manual provides detailed information about the VFD's features, functions, and programming parameters. It also includes wiring diagrams, which are crucial for proper installation and connection.
Programming Steps
Initial Setup
- Power On the VFD: After ensuring all safety precautions are in place, turn on the power supply to the VFD. The VFD will perform a self - diagnostic check, and the display will show the status.
- Select the Programming Mode: Use the keypad on the VFD or the programming software to enter the programming mode. On most Allen - Bradley VFDs, you can navigate through the menu using the arrow keys and select the appropriate options.
Motor Configuration
- Motor Nameplate Data Entry: Enter the motor's nameplate data, including the rated power, voltage, current, frequency, and speed. This information is essential for the VFD to accurately control the motor. For example, if you are using a motor with a rated power of 5 HP, a voltage of 460 V, a current of 7 A, a frequency of 60 Hz, and a speed of 1750 RPM, enter these values into the corresponding parameters in the VFD.
- Motor Type Selection: Select the type of motor you are using, such as an induction motor or a permanent magnet motor. Different motor types have different characteristics, and the VFD needs to be configured accordingly.
Control Mode Selection
- Speed Control: If your application requires precise speed control, select the speed control mode. In this mode, the VFD adjusts the frequency and voltage supplied to the motor to maintain the desired speed. You can set the target speed either through the keypad on the VFD or using an external control signal.
- Torque Control: For applications where torque control is more important, such as in conveyor systems or hoists, select the torque control mode. In this mode, the VFD adjusts the current supplied to the motor to maintain the desired torque.
Input and Output Configuration
- Digital Inputs: Configure the digital inputs on the VFD to perform specific functions. For example, you can assign a digital input to start or stop the motor, or to change the speed setpoint.
- Analog Inputs: If you are using analog signals for control, configure the analog inputs to receive and process these signals. You can set the input range and the scaling factor to ensure accurate control.
- Outputs: Configure the digital and analog outputs on the VFD to provide status information or to control external devices. For example, you can assign a digital output to indicate when the motor is running, or an analog output to provide feedback on the motor speed.
Parameter Tuning
- Acceleration and Deceleration Time: Adjust the acceleration and deceleration time parameters to control how quickly the motor speeds up or slows down. A shorter acceleration time can result in faster response, but it may also cause mechanical stress on the motor and the connected equipment.
- PID Tuning (if applicable): If your application requires proportional - integral - derivative (PID) control, such as in temperature or pressure control systems, tune the PID parameters. This involves adjusting the proportional gain, integral time, and derivative time to achieve the desired control performance.
Testing and Verification
After programming the VFD, it's important to test and verify its operation. Start the motor at a low speed and gradually increase the speed to the desired setpoint. Monitor the motor's performance using the VFD's display or an external monitoring device. Check for any abnormal noises, vibrations, or overheating. If there are any issues, go back to the programming parameters and make the necessary adjustments.
Troubleshooting
Even with proper programming, you may encounter some issues with the VFD. Here are some common problems and their possible solutions:
Overcurrent Fault
This fault occurs when the current flowing through the VFD exceeds the rated value. Possible causes include a short - circuit in the motor or the wiring, or an incorrect motor configuration. Check the wiring for any signs of damage, and verify the motor nameplate data entered in the VFD.
Overvoltage Fault
An overvoltage fault can be caused by a sudden decrease in the load or a problem with the power supply. Check the power supply voltage and make sure it is within the rated range. You may also need to adjust the braking resistor settings if the VFD is equipped with one.
Communication Error
If you are using a programming device to communicate with the VFD and encounter a communication error, check the connection cables for any loose connections or damage. Also, make sure that the communication settings in the programming device and the VFD are compatible.

Conclusion
Programming an Allen - Bradley VFD requires a good understanding of the device's features and functions, as well as careful attention to safety and proper configuration. By following the steps outlined in this blog post, you can successfully program an Allen - Bradley VFD for your specific application. If you have any questions or need further assistance, don't hesitate to contact us. We are here to help you with all your Allen - Bradley VFD needs. Whether you are interested in the Allen - Bradley 22B - D010N104 or the Allen - Bradley 25B - D6P0N104, our team of experts can provide you with the best solutions and support. Contact us to start a discussion about your requirements and explore the possibilities of using Allen - Bradley VFDs in your industrial processes.
References
- Allen - Bradley VFD User Manuals
- Industrial Automation Handbook on Motor Control and VFDs
- Technical Papers on Allen - Bradley VFD Programming and Applications


