


Hey there! I'm a supplier of Omron VFDs, and I often get asked about how to set the speed limit function of these drives. It's a crucial feature that can help ensure the safe and efficient operation of your equipment. In this blog post, I'll walk you through the process step by step, so you can get the most out of your Omron VFD.
First off, let's talk about why setting the speed limit is important. When you're using a variable frequency drive (VFD), you want to make sure that the motor doesn't run too fast or too slow. Running the motor at an inappropriate speed can lead to all sorts of problems, like overheating, excessive wear and tear, and even damage to the equipment. By setting the speed limit, you can control the motor's speed within a safe and optimal range, which can extend the lifespan of your equipment and improve its performance.
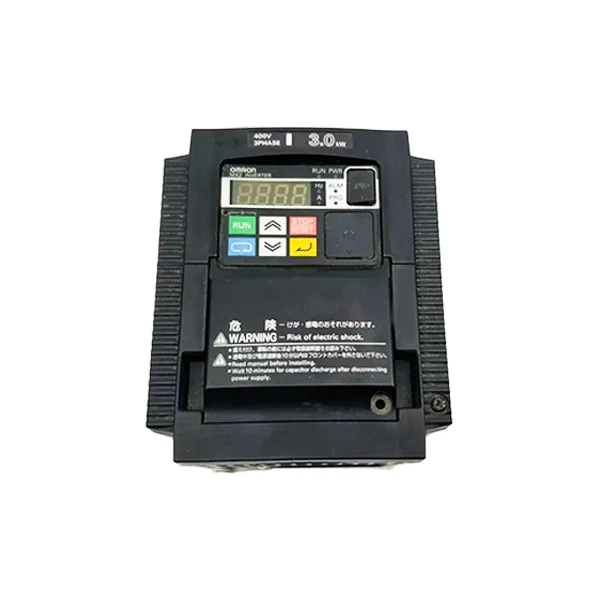
Now, let's get into the nitty-gritty of how to set the speed limit function of an Omron VFD. The process may vary slightly depending on the specific model of the drive you're using, but the general steps are pretty much the same. I'll use the Omron 3G3MX2 - A4030 - E as an example, but these steps should apply to other models like the Omron Inverter MX2 3G3MX2 - A4022 - E and 3G3MX2 - A2015 - E Omron as well.
Step 1: Power On and Access the Parameter Menu
Before you start setting the speed limit, make sure your Omron VFD is powered on and in a stable operating condition. Once it's up and running, you'll need to access the parameter menu. Usually, you can do this by pressing the "Mode" or "Menu" button on the drive's control panel. Keep pressing the button until you see the parameter menu on the display.
Step 2: Locate the Speed Limit Parameters
In the parameter menu, you'll need to find the parameters related to the speed limit. These parameters are often labeled something like "Upper Speed Limit" and "Lower Speed Limit". You may need to scroll through the menu using the arrow buttons on the control panel to find them.
Step 3: Set the Upper Speed Limit
Once you've located the "Upper Speed Limit" parameter, it's time to set the maximum speed for your motor. You can do this by using the up and down arrow buttons to adjust the value on the display. The value is usually displayed in Hertz (Hz) or revolutions per minute (RPM), depending on how your drive is configured.
Think about the requirements of your equipment when setting the upper speed limit. You don't want to set it too high, or the motor may run at an unsafe speed. On the other hand, setting it too low may limit the performance of your equipment. So, do some research or consult the equipment's manual to determine the appropriate upper speed limit.
Step 4: Set the Lower Speed Limit
After setting the upper speed limit, you'll need to set the lower speed limit in a similar way. Locate the "Lower Speed Limit" parameter in the menu and use the arrow buttons to adjust the value. The lower speed limit ensures that the motor doesn't run too slowly, which can also cause problems like insufficient torque or uneven operation.
Again, consider the needs of your equipment when setting the lower speed limit. You want to make sure the motor can still operate smoothly and efficiently at the lowest speed you set.
Step 5: Save the Settings
Once you've set the upper and lower speed limits to your satisfaction, you'll need to save the settings. Usually, there's a "Save" or "Enter" button on the control panel. Press this button to confirm the new settings. The drive will then store these values, and the speed limit function will be activated.
Step 6: Test the Speed Limit Function
After saving the settings, it's a good idea to test the speed limit function to make sure it's working correctly. You can do this by running the motor and gradually increasing or decreasing the speed. As you approach the upper or lower speed limit you set, the drive should automatically prevent the motor from going beyond these limits.

If you notice any issues during the test, like the motor exceeding the speed limits or not running smoothly, double - check your settings and make sure you entered the correct values. You may also need to consult the drive's manual or contact technical support for further assistance.
Tips and Tricks
- Keep Records: It's a good idea to keep a record of the speed limit settings you've made. This can be helpful if you need to make changes in the future or if you encounter any problems with the drive.
- Regular Checks: Periodically check the speed limit settings to make sure they haven't been accidentally changed. Over time, vibrations or other factors could cause the settings to drift, so it's important to stay on top of it.
- Understand Your Equipment: Different types of equipment may have different speed requirements. Make sure you understand the specific needs of your equipment before setting the speed limit. For example, a conveyor belt may require a different speed range than a pump.
In conclusion, setting the speed limit function of an Omron VFD is a relatively straightforward process, but it's an important one. By following these steps and keeping these tips in mind, you can ensure that your motor runs at a safe and optimal speed, which can improve the performance and longevity of your equipment.
If you're in the market for an Omron VFD or have any questions about setting the speed limit or other features, don't hesitate to reach out. We're here to help you find the right solution for your needs and guide you through the setup process. Whether you're a small business owner or a large industrial operator, we've got the expertise and the products to meet your requirements.
References
- Omron VFD User Manuals
- Technical Documents on Variable Frequency Drives


