

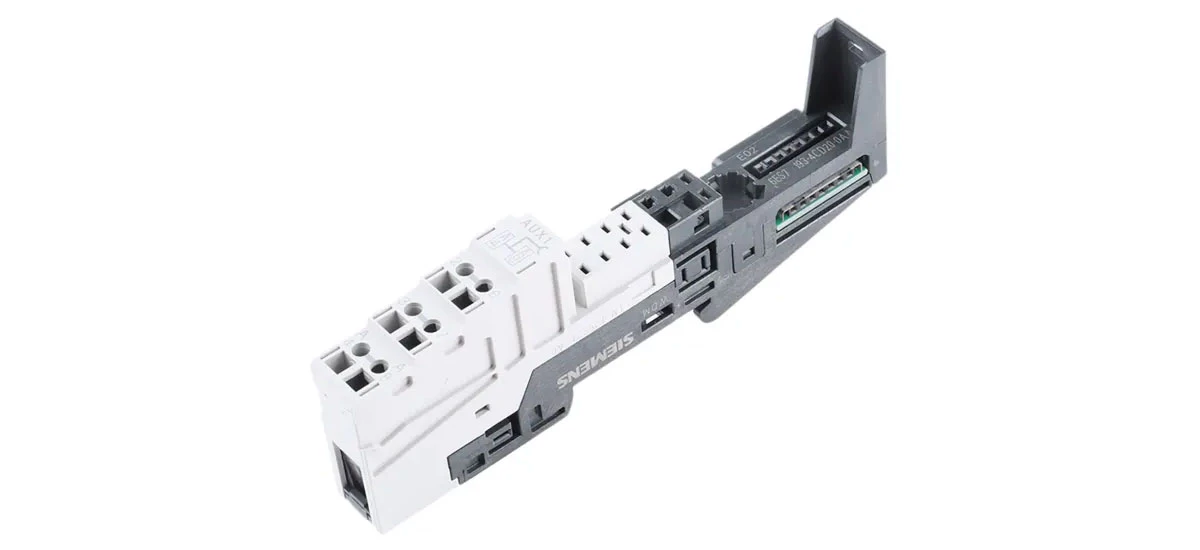
If you've ever tried connecting electrical wires for a small project-like installing a new lamp or setting up LED lights-you might have wondered: How do I keep wires secure and safe? The answer often lies in a simple but powerful tool: a terminal module. For beginners, understanding what a terminal module is and how to use it can make electrical work easier, neater, and much safer. Let's break down everything you need to know about terminal modules, from their basic purpose to step-by-step installation.
What Exactly Is a Terminal Module?
First, let's start with the basics: A terminal module is a small, durable component designed to connect electrical wires or devices in a safe, organized way. Think of it as a "wire meeting spot"-instead of twisting wires together (which can be messy, loose, or risky), a terminal module holds wires firmly in place so electricity flows smoothly.
Most terminal modules are made of two main parts: a plastic housing (to prevent shocks) and metal contacts inside (to conduct electricity between wires). They come in different sizes, but all serve the same core job: making wire connections reliable. Whether you're working on a home project (like a DIY smart plug) or a small electronic device, a terminal module ensures your wires stay connected-no more loose ends or short circuits.
Why is this important? Loose wire connections are one of the most common causes of electrical problems, like flickering lights or even small fires. A terminal module fixes this by keeping wires tight and separated, so you can trust your electrical setup to work safely.
Why Do We Need Terminal Modules? Key Benefits for Beginners
You might be thinking: Can't I just twist wires together and use electrical tape? While that works for tiny, temporary jobs, a terminal module offers big advantages-especially for beginners. Here are the top reasons to use a terminal module:
Safety First
The biggest benefit of a terminal module is safety. When wires are twisted together, they can easily come loose over time (from vibration or temperature changes). A loose wire can touch another wire, causing a "short circuit" (a sudden surge of electricity that can spark fires). A terminal module holds wires tightly with built-in clamps or screws, so this risk drops drastically. Electricians recommend terminal modules for even small projects because they reduce shock and fire hazards.
Neater, Easier-to-Fix Setups
Twisted wires covered in tape get messy fast-if you need to adjust your project (like adding another light), you'll have to cut the tape and redo the twist. A terminal module keeps wires organized in one place. Most modules have labeled slots (for example, "Wire 1" or "Power In"), so you can see exactly which wire goes where. If you need to disconnect or rewire later, just open the module-no cutting or re-taping required.
Perfect for Beginners
You don't need special skills to use a terminal module! Unlike complex electrical tools, most terminal modules work with basic tools (like a small screwdriver) and simple steps. Even if you've never done electrical work before, a terminal module guides you to make correct connections-so you can feel confident in your project.
Common Types of Terminal Modules (For Home Electrical Projects)
Not all terminal modules are the same-some are better for specific jobs. As a beginner, you'll mostly use two types, which are easy to find and use. These are the most common types of terminal modules for home electrical projects:
Screw Terminal Modules
Screw terminal modules are the most popular choice for beginners. They have small screws on top: to connect a wire, you strip a tiny bit of the wire's plastic covering (exposing the metal inside), insert the metal part into a slot, and tighten the screw with a screwdriver. The screw presses the wire against a metal contact, creating a secure connection.
These modules work for most home projects, like connecting ceiling fans, lamps, or outdoor string lights. They're affordable (usually \(2–\)5 each) and easy to find at hardware stores. The only downside? You need a screwdriver-but even a small, cheap one works.
Spring Terminal Modules
Spring terminal modules are even simpler than screw types! They use a small spring inside to hold wires tight. To install: push a lever or button on the module, insert the stripped wire, and let go of the lever. The spring snaps shut, gripping the wire firmly.
These are great if you're in a hurry or don't want to use a screwdriver. They're perfect for small wires (like those in LED strips) but aren't as strong for very thick wires (like the ones in washing machines). Still, they're a fantastic option for quick, simple projects.
How to Install a Terminal Module: A Step-by-Step Guide for Beginners
Installing a terminal module is easy-even if you're new to electrical work. Follow these steps to do it safely and correctly (this guide uses a screw terminal module, the most common type):
Step 1: Gather Your Tools
You'll only need 3 things:
- A small screwdriver (Phillips or flathead, depending on the module's screws)
- A wire stripper (to remove the plastic covering from wires-you can buy a cheap one for 5–10)
- Electrical tape (to cover the module later, for extra safety)
Step 2: Turn Off the Power (Critical!)
Never work with live electricity! If your project is connected to a wall outlet (like a lamp or light fixture), turn off the power at the circuit breaker (the box with switches in your basement or garage). To be safe, test the outlet with a voltage tester (if you have one) to make sure no electricity is flowing.
Step 3: Strip the Wires
Take the wires you want to connect and use the wire stripper to remove ¼ inch of plastic covering from the end of each wire. Be careful not to cut the metal inside-you just need to expose it so it can conduct electricity. If you strip too much, fold the extra metal over (or trim it) to avoid touching other wires.
Step 4: Insert Wires into the Terminal Module
Look at your terminal module-it will have slots (usually labeled "Input" or "Output") for each wire. For each wire:
- Loosen the screw on the slot (turn it counterclockwise) until there's enough space for the wire.
- Insert the stripped metal part of the wire into the slot (don't let the plastic covering go inside-only the metal).
- Tighten the screw (turn it clockwise) until it's snug. Pull the wire gently to make sure it doesn't come loose-if it does, tighten the screw a little more.
Step 5: Check the Connection
Once all wires are in the module, give each wire a soft tug. If any wire comes out, redo that connection (loosen the screw, reinsert the wire, and tighten again). A loose connection is unsafe, so take your time here.
Step 6: Secure the Module (Optional but Recommended)
If your terminal module is in a place that might move (like inside a lamp), wrap a small piece of electrical tape around the module to hold it in place. This prevents the module from shifting and loosening the wires.
Step 7: Turn the Power Back On
Once everything is secure, turn the power back on at the circuit breaker. Test your project (e.g., turn on the lamp)-it should work smoothly! If it doesn't, turn off the power again and check your connections.
Terminal Module vs. Wire Connector: Which Is Better?
You might have seen "wire connectors" (small plastic caps that twist over wires) at the store. So when should you use a terminal module instead? Let's compare them to answer: Terminal module vs wire connector: which is better?
Wire Connectors: Good for Tiny, Temporary Jobs
Wire connectors are cheap (usually $1 for a pack of 10) and easy for connecting 2 short wires. For example, if you need to fix a broken lamp wire by joining two small pieces, a wire connector works. But they have big limits:
- They only hold 2 wires (max).
- They're hard to take apart (you'll probably break the connector to redo the connection).
- They can come loose over time (especially if the wires move).
Terminal Modules: Better for Most Beginner Projects
A terminal module is better if:
- You're connecting 3 or more wires (e.g., setting up a string of 5 LED lights).
- You might need to disconnect/reconnect wires later (e.g., adding more lights to a project).
- You want a long-term, safe connection (e.g., a ceiling fan that stays up for years).
For example, if you're building a DIY shelf with LED lights, a terminal module lets you add or remove lights easily. A wire connector would force you to cut and rejoin wires every time-messy and risky.
In short: Use wire connectors for quick, 2-wire jobs. Use a terminal module for everything else!
Safety Tips When Using a Terminal Module
Even though terminal modules are safe, you still need to follow basic electrical safety rules. These tips will keep you and your home protected:
Always Turn Off Power First
This is the most important rule! Never touch wires or a terminal module while electricity is flowing. Even a small shock can hurt, and loose wires can spark fires.
Don't Use Damaged Terminal Modules
Check the module before use: If the plastic housing is cracked, or the metal contacts are rusty, throw it away. A damaged module can't hold wires safely and might cause shorts.
Use the Right Size Module
Terminal modules come in sizes for different wire thicknesses. If your wire is too thick, it won't fit in the slot (and you'll force it, which breaks the module). If it's too thin, the screw won't hold it tight. Check the module's label (it will say "Fits 18–22 AWG" or similar-AWG is the wire thickness) to match your wires.
Don't Overload the Module
Each terminal module has a "current rating" (e.g., "10A" or "15A")-this is the maximum electricity it can handle. Don't connect too many high-power devices (like a space heater + a toaster) to one module. Overloading can melt the plastic and start fires.
Cover the Module in Damp Areas
If you're using a terminal module outdoors or in a damp place (like a bathroom), use a weatherproof module (look for "IP65" on the package). If you don't have one, wrap the module in waterproof electrical tape to keep water out-water and electricity don't mix!
Frequently Asked Questions (FAQs) About Terminal Modules
Let's answer the most common questions beginners have about terminal modules:
Q1: Can I use a terminal module for outdoor projects?
A1: Yes! Just use a weatherproof (IP65 or higher) terminal module. Regular modules will get damaged by rain or snow. You can also wrap a regular module in waterproof tape, but weatherproof ones are safer.
Q2: How many wires can a terminal module hold?
A2: It depends on the size. Small modules hold 2–3 wires (great for lamps), while larger ones hold 5–6 wires (good for string lights). Always check the module's label-this info is usually printed on the plastic.
Q3: Do I need to be an electrician to use a terminal module?
A3: No! Beginners can use them easily, as long as they follow safety steps (like turning off power). The steps are simple: strip wires, insert, tighten screws. Thousands of people use terminal modules for DIY projects every day.
Q4: How long does a terminal module last?
A4: A good-quality terminal module can last 10+ years. The plastic doesn't break easily, and the metal contacts stay rust-free if kept dry. Just check it once a year (e.g., when you change smoke detector batteries) to make sure wires are still tight.
Q5: Are terminal modules expensive?
A5: No-they're very affordable! A single module costs 2–5, and packs of 10–20 cost 10–20. This is much cheaper than hiring an electrician to fix a loose wire (which can cost 50–100).
Final Thoughts
A terminal module is a beginner's best friend for electrical projects. It's simple to use, safe, and keeps your wires organized-no more messy twists or risky connections. Whether you're fixing a lamp, setting up LED lights, or building a DIY project, a terminal module ensures your work is reliable and long-lasting.
Remember: Always follow safety rules (turn off power!), use the right size module, and buy quality brands. With a terminal module in your toolbox, you'll be able to tackle electrical projects with confidence-no experience needed!


