


Debugging an Omron PLC program is a crucial skill for anyone working with industrial automation systems. As an Omron PLC supplier, I've encountered various issues during the debugging process and have developed effective strategies to resolve them. In this blog, I'll share some essential steps and techniques to help you debug an Omron PLC program efficiently.
Understanding the Basics of Omron PLCs
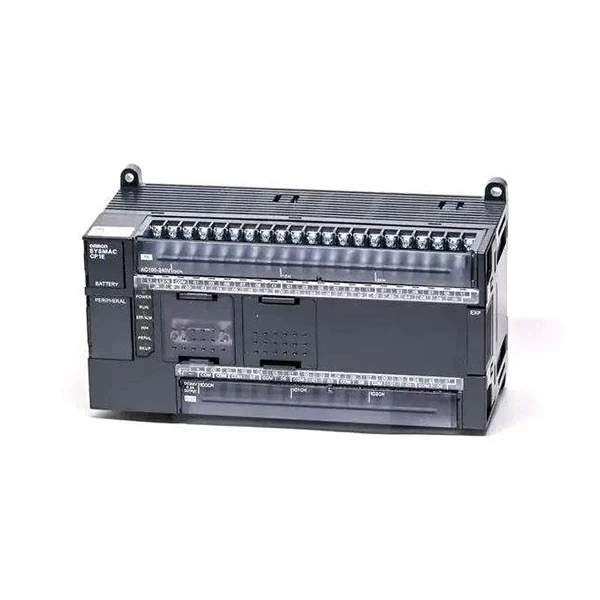
Before diving into debugging, it's essential to have a solid understanding of Omron PLCs. Omron offers a wide range of PLC models, each with its own features and capabilities. For example, the Omron CP1L-L14DT-D is a compact PLC suitable for small-scale automation applications, while the Omron CP1E-N20DR-A and Omron CP1E-N60SDR-A provide more advanced functionality for larger systems.
Familiarize yourself with the programming language used in Omron PLCs, which is typically ladder logic. Ladder logic is a graphical programming language that resembles electrical circuits, making it easy to understand and implement for engineers and technicians.
Preparing for Debugging
Before you start debugging, gather all the necessary information about the PLC program and the system it controls. This includes the program code, the wiring diagram, and any documentation related to the application. Review the program code to understand its logic and identify any potential problem areas.
Make sure you have the appropriate tools for debugging, such as a programming cable, a computer with the Omron programming software installed, and a multimeter for measuring electrical signals.
Step 1: Check the Hardware
The first step in debugging an Omron PLC program is to check the hardware. Inspect the PLC for any visible damage, loose connections, or faulty components. Check the power supply to ensure that the PLC is receiving the correct voltage.
Use a multimeter to measure the input and output signals of the PLC. Compare the measured values with the expected values based on the program logic. If you find any abnormal signals, it could indicate a hardware problem.
Step 2: Monitor the Inputs and Outputs
Once you've checked the hardware, start monitoring the inputs and outputs of the PLC. Use the Omron programming software to access the monitoring function, which allows you to view the current state of the inputs and outputs in real-time.
Compare the monitored values with the expected values based on the program logic. If you find any discrepancies, it could indicate a problem with the program or the hardware.
Step 3: Use Debugging Tools
The Omron programming software provides several debugging tools that can help you identify and resolve issues in the PLC program. One of the most useful tools is the step-by-step execution feature, which allows you to execute the program one instruction at a time and monitor the changes in the inputs and outputs.
Use the step-by-step execution feature to isolate the problem area in the program. Check the logic of each instruction and make sure it is correct. If you find any errors, correct them and test the program again.
Another useful debugging tool is the breakpoint feature, which allows you to pause the program execution at a specific point. Use the breakpoint feature to examine the state of the inputs and outputs at a particular moment in the program execution.
Step 4: Check the Program Logic
If you've checked the hardware and used the debugging tools but still can't find the problem, it's time to review the program logic. Look for any logical errors in the program, such as incorrect use of instructions, improper sequencing of operations, or incorrect use of timers and counters.
Use the ladder logic editor in the Omron programming software to modify the program code. Make sure to save a backup of the original program before making any changes.
Step 5: Test the Program
Once you've made the necessary changes to the program, test it thoroughly to ensure that it works correctly. Use the step-by-step execution feature and the monitoring function to verify that the program logic is correct and that the inputs and outputs are working as expected.
If you encounter any issues during the testing process, repeat the debugging steps until you've resolved all the problems.
Step 6: Document the Debugging Process
Finally, document the debugging process, including the steps you took, the problems you encountered, and the solutions you implemented. This documentation will be useful for future reference and can help you troubleshoot similar issues in the future.
Conclusion
Debugging an Omron PLC program requires a systematic approach and a good understanding of the hardware and software. By following the steps outlined in this blog, you can effectively identify and resolve issues in your Omron PLC program.
As an Omron PLC supplier, we are committed to providing our customers with high-quality products and excellent technical support. If you have any questions or need assistance with debugging your Omron PLC program, please don't hesitate to contact us. We'll be happy to help you with your procurement and provide you with the best solutions for your automation needs.

References
- Omron Corporation. (Year). Omron PLC Programming Manual.
- Industrial Automation Handbook. (Year). Various authors.


