


Hey there! As an Omron PLC supplier, I've gotten tons of questions about setting up stepper motor parameters in an Omron PLC. It can seem a bit daunting at first, but once you get the hang of it, it's not that tough. In this blog, I'll walk you through the whole process step by step.
Understanding the Basics
Before we jump into setting up the parameters, let's quickly go over what a stepper motor is and how it works with an Omron PLC. A stepper motor is a type of brushless DC electric motor that divides a full rotation into a number of equal steps. This makes it great for applications where precise positioning is needed, like in CNC machines, 3D printers, and automated manufacturing equipment.

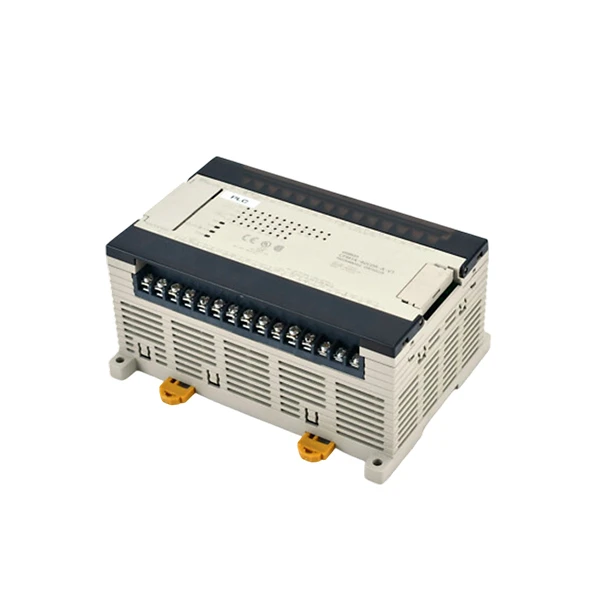
An Omron PLC, on the other hand, is a programmable logic controller that can be used to control various industrial processes, including stepper motors. By setting up the right parameters in the PLC, you can control the speed, direction, and position of the stepper motor.
Choosing the Right Omron PLC
The first step in setting up the stepper motor parameters is to choose the right Omron PLC for your application. Omron offers a wide range of PLCs, each with different features and capabilities. Two popular models are the Omron CP2E - N14DR - A and the Omron CPM1A - 40CDR - A - V1.
The Omron CP2E - N14DR - A is a compact and cost - effective PLC that's suitable for small - scale applications. It has 14 input/output points and can handle basic control tasks. The Omron CPM1A - 40CDR - A - V1, on the other hand, is a more powerful PLC with 40 input/output points. It's better suited for larger applications that require more complex control.
Power Supply Considerations
Another important factor to consider is the power supply for the stepper motor and the PLC. You'll need a reliable power supply that can provide enough voltage and current to run both the motor and the PLC. A good option is the Omron S8VS - 24024, which is a 24V DC power supply that can handle a decent amount of load.
Setting Up the Hardware
Once you've chosen the right PLC and power supply, it's time to set up the hardware. First, connect the stepper motor driver to the PLC. The driver is responsible for converting the low - power signals from the PLC into high - power signals that can drive the stepper motor.
Make sure to follow the wiring diagram provided in the user manuals of both the PLC and the stepper motor driver. Incorrect wiring can lead to malfunction or even damage to the equipment.
Configuring the PLC Software
Now comes the fun part - configuring the PLC software. Omron uses programming software like CX - Programmer to program its PLCs. Here's a step - by - step guide on how to set up the stepper motor parameters:
- Create a New Project: Open CX - Programmer and create a new project for your Omron PLC. Select the correct PLC model you're using.
- Define the I/O Addresses: Identify the input and output addresses that will be used to control the stepper motor. You'll need to assign addresses for signals like direction control, pulse output, and enable.
- Set the Pulse Output Parameters: In the software, you'll need to set the pulse output parameters for the stepper motor. This includes the pulse frequency, which determines the speed of the motor, and the pulse count, which determines the number of steps the motor will take.
- Configure the Direction Control: Set up the direction control signal in the PLC software. This signal determines whether the stepper motor will rotate clockwise or counter - clockwise.
- Enable the Output: Make sure to enable the output for the stepper motor control signals in the PLC software. Without enabling the output, the motor won't receive any signals.
Testing the Setup
After you've configured the PLC software, it's time to test the setup. Power on the PLC and the stepper motor driver. Send some test commands from the PLC to the motor and see if it responds as expected. You can use a multimeter or an oscilloscope to check the signals at the output of the PLC and the input of the motor driver.
If the motor doesn't work correctly, go back and check your wiring and the parameter settings in the PLC software. It's common to make small mistakes, so don't get discouraged if it takes a few tries to get it right.
Troubleshooting Tips
Here are some common issues you might encounter and how to fix them:
- Motor Not Moving: Check the power supply to the motor and the driver. Make sure the enable signal is active in the PLC software. Also, check the wiring to ensure there are no loose connections.
- Incorrect Direction: Double - check the direction control signal in the PLC software. It might be set to the wrong value.
- Motor Overheating: This could be due to incorrect pulse frequency settings. Lower the frequency if the motor is overheating.
Fine - Tuning the Parameters
Once the motor is working, you can fine - tune the parameters to optimize its performance. You can adjust the pulse frequency to change the speed of the motor, and the pulse count to change the position accuracy. Experiment with different values to find the best settings for your application.
Conclusion
Setting up the stepper motor parameters in an Omron PLC might seem complicated at first, but with the right knowledge and a bit of practice, you can do it. Remember to choose the right PLC, configure the hardware correctly, and set up the software parameters accurately.
If you're interested in purchasing Omron PLCs or need more help with setting up stepper motor parameters, feel free to reach out. We're here to assist you with all your Omron PLC needs and help you get the most out of your industrial automation systems.
References
- Omron CP2E - N14DR - A User Manual
- Omron CPM1A - 40CDR - A - V1 User Manual
- Omron S8VS - 24024 Power Supply Manual
- CX - Programmer Software Documentation


